asim
ASim Demo
To run a demo, click one of
or follow the instructions below to run everything locally on your machine.
-
clone this repo and make the top level of the repo your current working directory.
-
make serverto start a local server (requires python3) -
Browse to
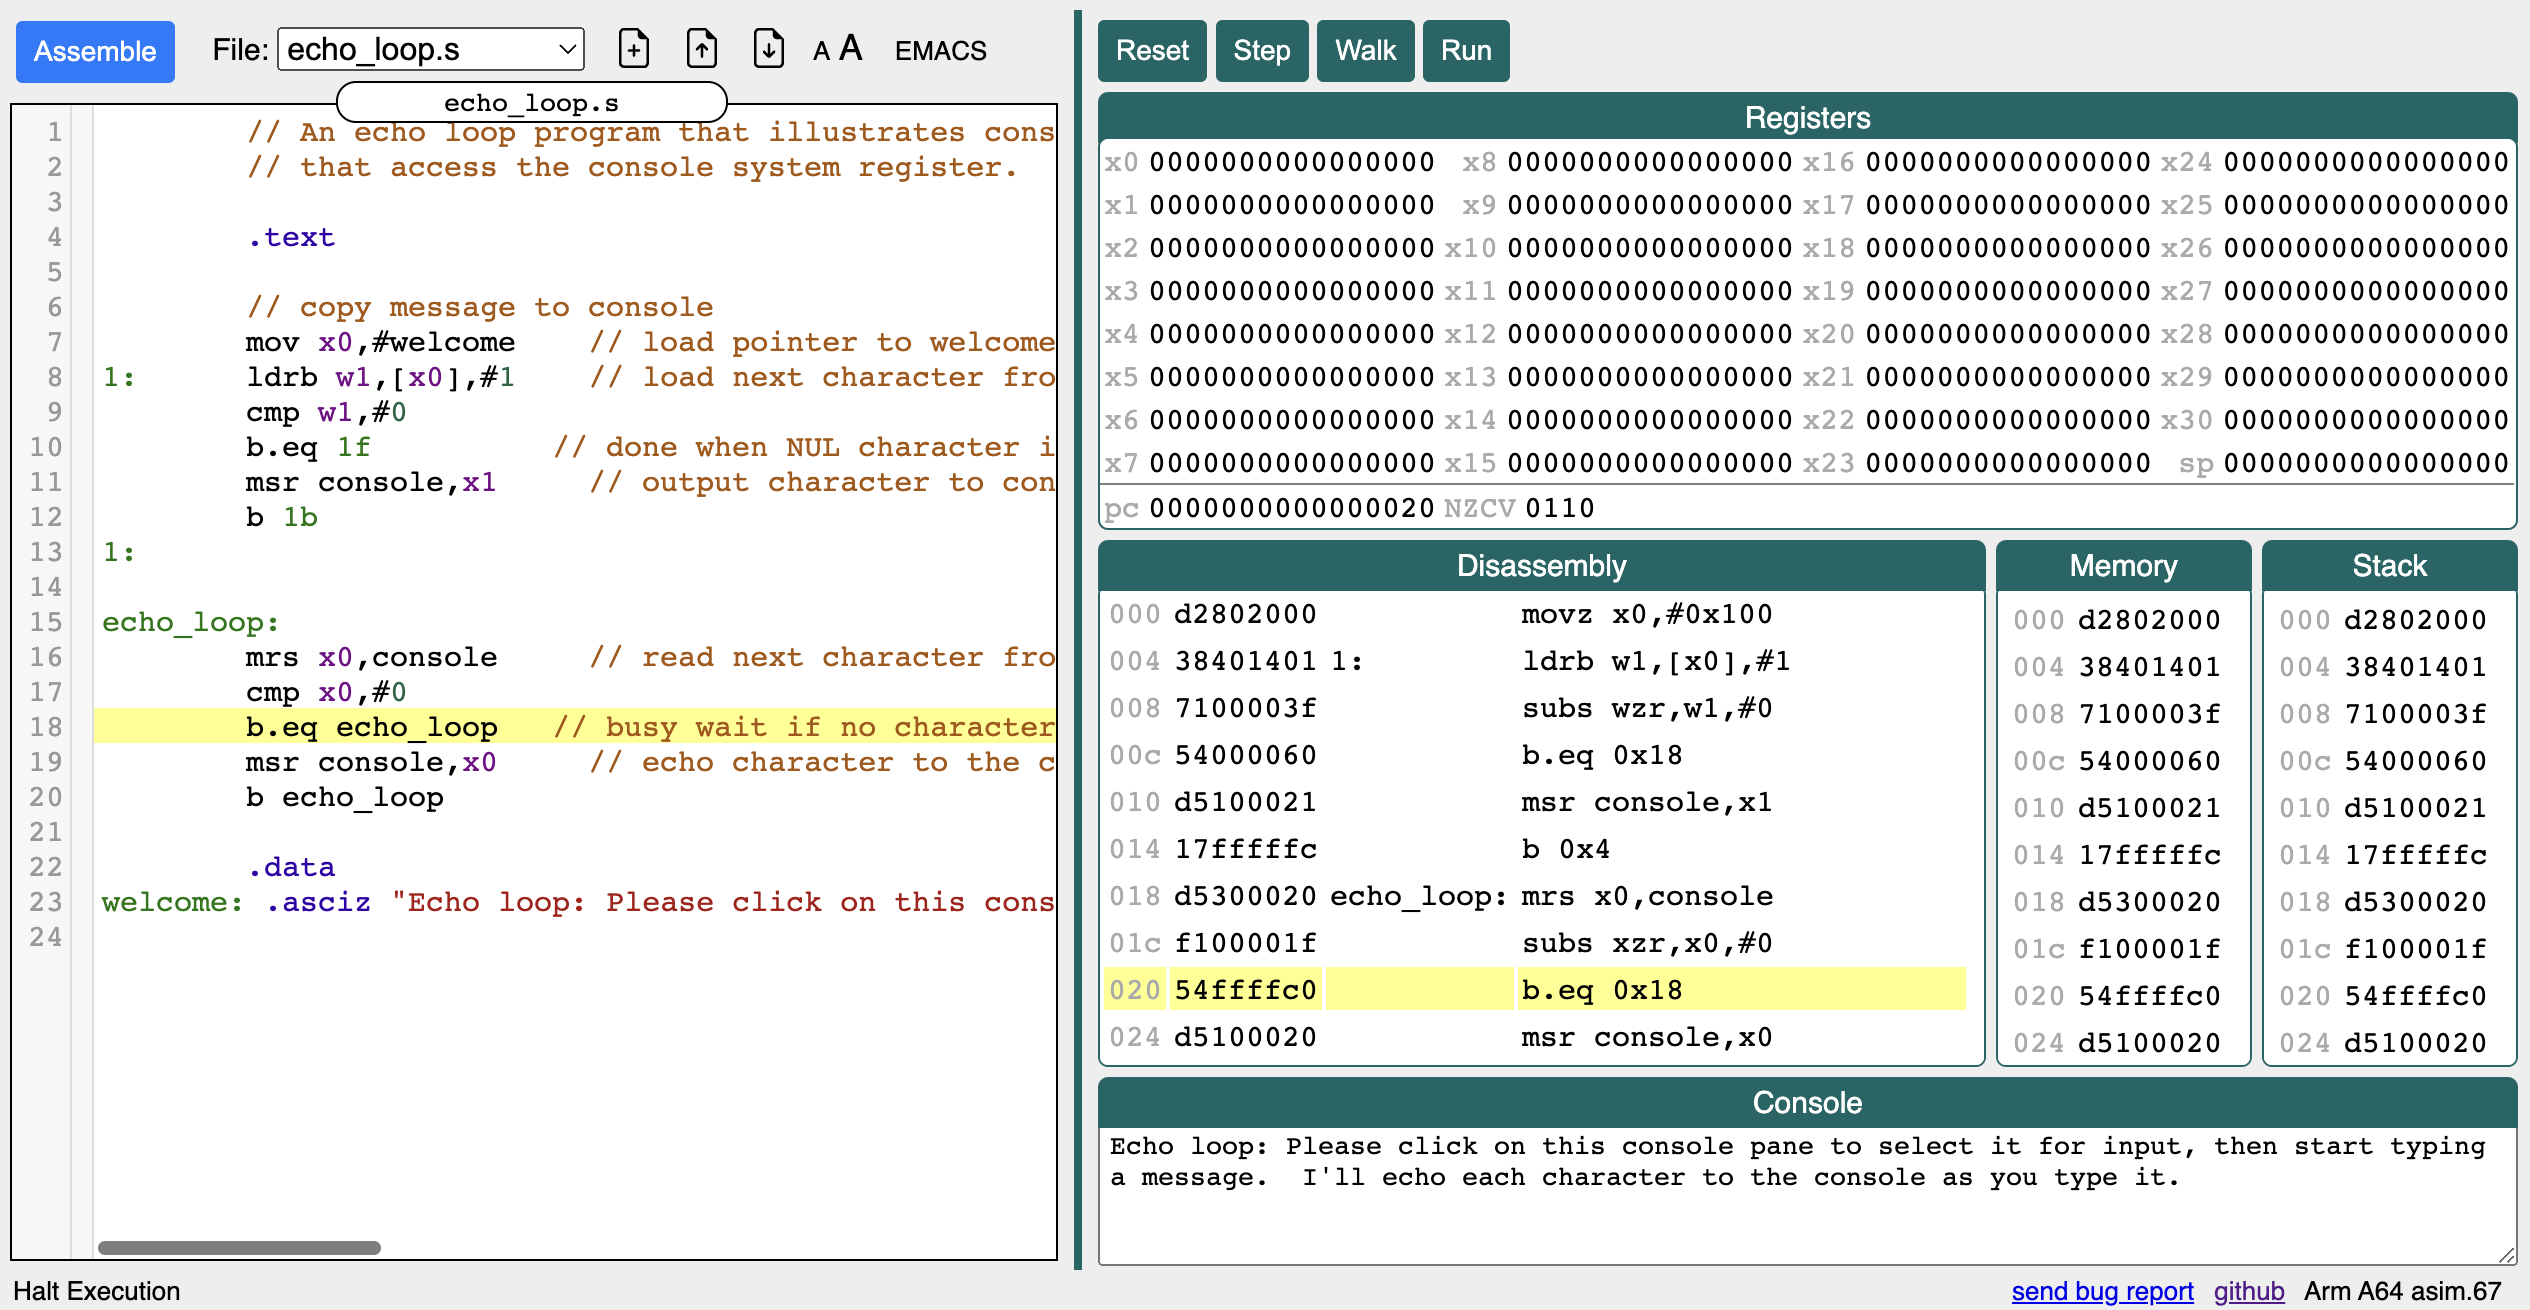
http://localhost:8000/asim.html. This loads a webpage that makes an instance of the ASim tool then loads an example assembly language program. Please see the screenshot at the bottom of this page. Usehttp://localhost:8000/educore.htmlorhttp://localhost:8000/educore_pipelined.htmlfor the Educore versions of the demo.
The toolbar at the top of the editor pane includes the following controls:
| Control | Description |
|---|---|
| Click button to run the built-in assembler on the currently selected editor buffer. Assembly errors will be shown above the buffer, each with a link you can click to take you to the offending line. | |
| Use this drop-down list to select one of the loaded files for editing. | |
| Use one of these three buttons to create a new editor buffer, upload a file from from your computer into a new editor buffer, or download the currently selected editor buffer to your computer. Note that you can edit the name of buffer by clicking on the buffer name |
|
| Use these controls to decrease or increase the font size in the editor buffers, or to change the key mapping used by the CodeMirror editor. |
Once the browser is displaying the ASim tool and you’ve selected the
desired editor buffer, you can click Assemble. This will open the
simulation pane to the right of the editor pane. The simulation pane
has execution controls at the top and several subpanes showing the
state of the simulated processor. You can click and drag the vertical
divider between the editor and simulation panes to adjust the layout.
Here are the simulation controls:
| Control | Description |
|---|---|
Reset |
reset the simulation to its initial state. |
Step |
execute the next (highlighted) instruction. The state displays are updated to reflect any changes made by the executed instruction. Reads and writes are indicated by highlighting the appropriate register and/or memory location. |
Walk |
execute many steps sequentially, with a state update after each step. Once started, the button changes to “Stop”, which you can click to stop the simulation. The simulation will also halt when it reaches a user breakpoint, a HLT, BRK, or YIELD instruction, or when the simulator detects that the PC hasn’t changed after executing an instruction (i.e., an instruction like “b .” that branches to itself). |
Run |
like Walk but don’t update state display after each instruction. Once started, the button changes to “Stop”, which you can click to stop the simulation. This is much faster with simulation rates of multiple MIPS on my relatively new iMac. |
You can set a user breakpoint by clicking in the editor window to the right of the line number. Breakpoint locations are shown with a small red circle. Clicking on the red circle will remove the breakpoint. Execution will pause at the first instruction on (or after) this line.

ASim Screenshot:
